Guide

Ready in a few minutes

From the server to the passkey: everything you need to know for setup and everyday use. Button names are written as the app shows them in English.

1. Put the vault on a WebDAV server

Simply KeePass reads and writes a KeePass file (KDBX 4) over WebDAV. If you already have a file from KeePass or KeePassXC, just use that. Otherwise, create a new one with one of those programs.

  • Any WebDAV server that supports GET, PUT and HEAD with ETags will do – for example Apache or nginx with mod_dav, many NAS systems and hosting providers.
  • The address must point directly at the file, e.g. https://dav.example.com/vault/passwords.kdbx. For security reasons the app does not follow redirects.
  • Use HTTPS. For an address without HTTPS, the app warns you and asks to confirm.
  • The server needs no CORS settings – the apps talk to it natively, not from inside a browser.
2. First start

  1. Enter the WebDAV URL of the .kdbx, plus the WebDAV user and password if your server requires a login.
  2. Enter your master password and/or choose your key file.
  3. Tap Unlock.

The connection is stored encrypted on the device. On the next start it appears as a single line; Change unfolds it again. The key file is never stored.

Tip for more devices: Instead of typing everything, open the vault on a device that’s already set up, tap 📲 New device and scan the code on the new phone or tablet with Read from another device.

3. Unlock with fingerprint, Face ID or Touch ID

If you turn on biometrics while unlocking with the master password, the app puts the master password into the device’s secure storage – protected by your finger or face. After that, the Unlock with Touch ID button (or fingerprint / Face ID) is all it takes.

  • Mac: The approval is valid for 24 hours from the last typed unlock, then it’s the master password’s turn once.
  • Android and iOS: No expiry. If you add a new finger or face, the stored password becomes invalid and the app asks for it once.

4. Search and copy

After unlocking, search has focus right away – just start typing. The list is sorted by last use; Oldest first reverses it, handy for tidying up.

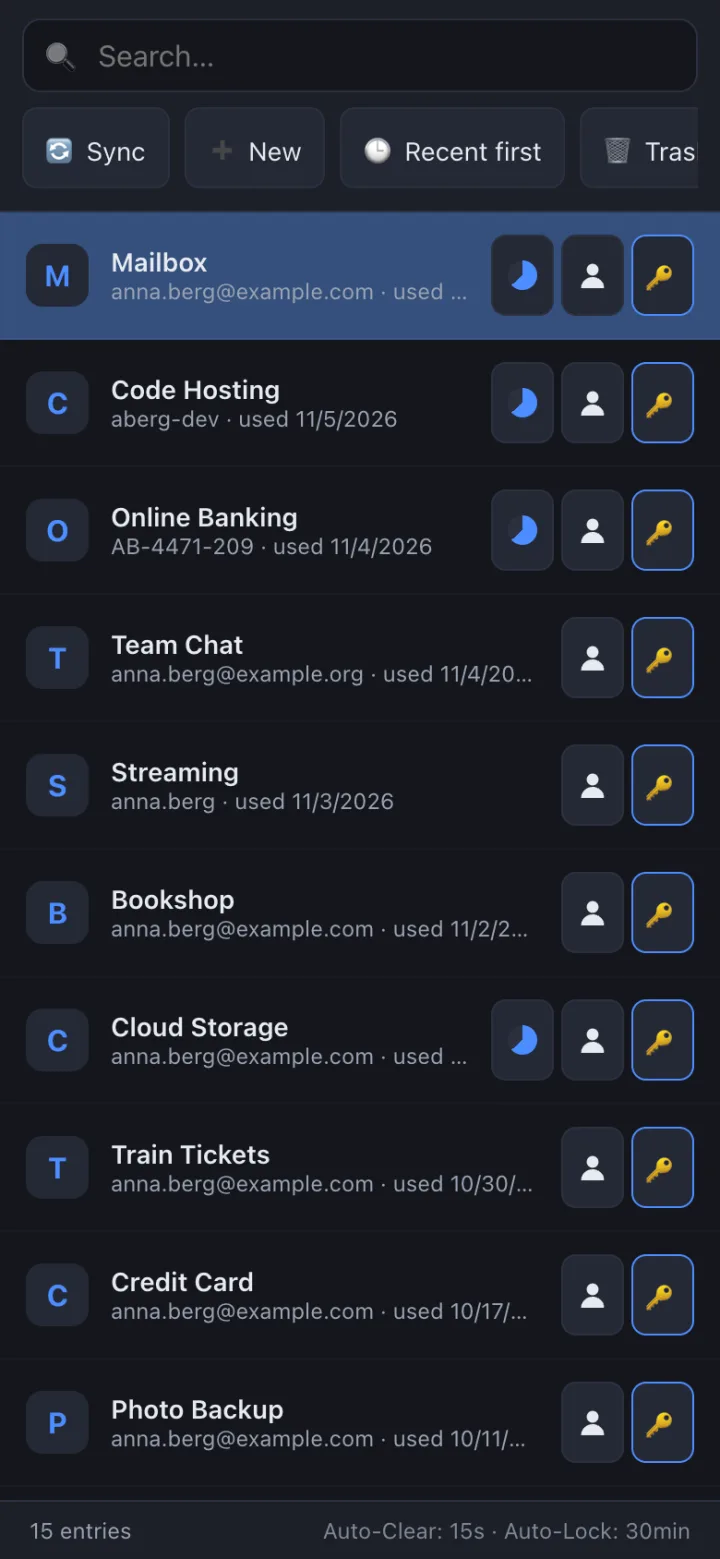
  • Every row has buttons for username, password and – if there is one – the one-time code.
  • The clipboard is cleared after 15 seconds and once more when locking.
  • On the Mac: / search · ↑/↓ select · Enter or double-click copies the password · ⌘N username · ⌘U URL · ⌘L lock · Esc cancel.
List with copy buttons on the phone
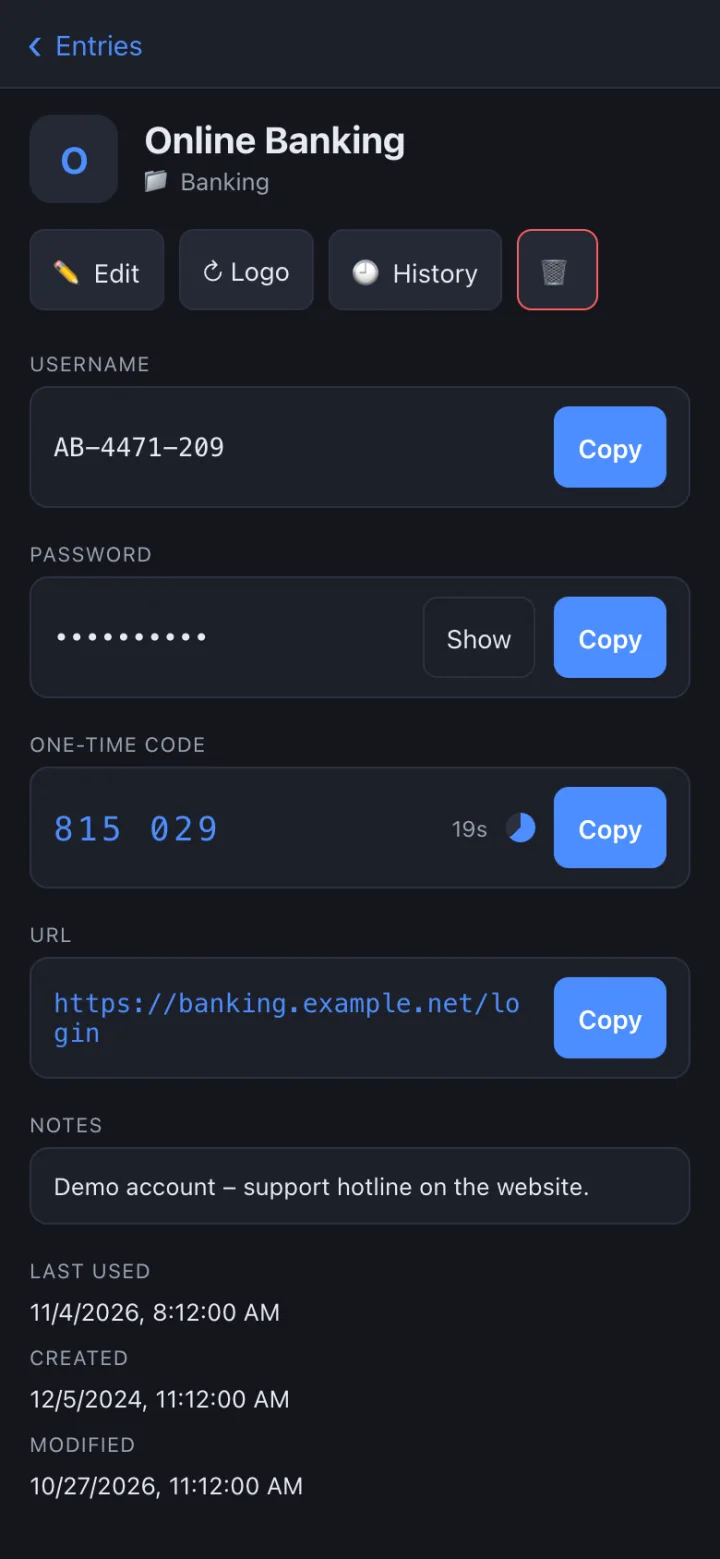
Entry with one-time code on the phone

5. Create and edit entries

  • ➕ New opens an empty form; the entry is only created with Apply. Edit changes an existing one.
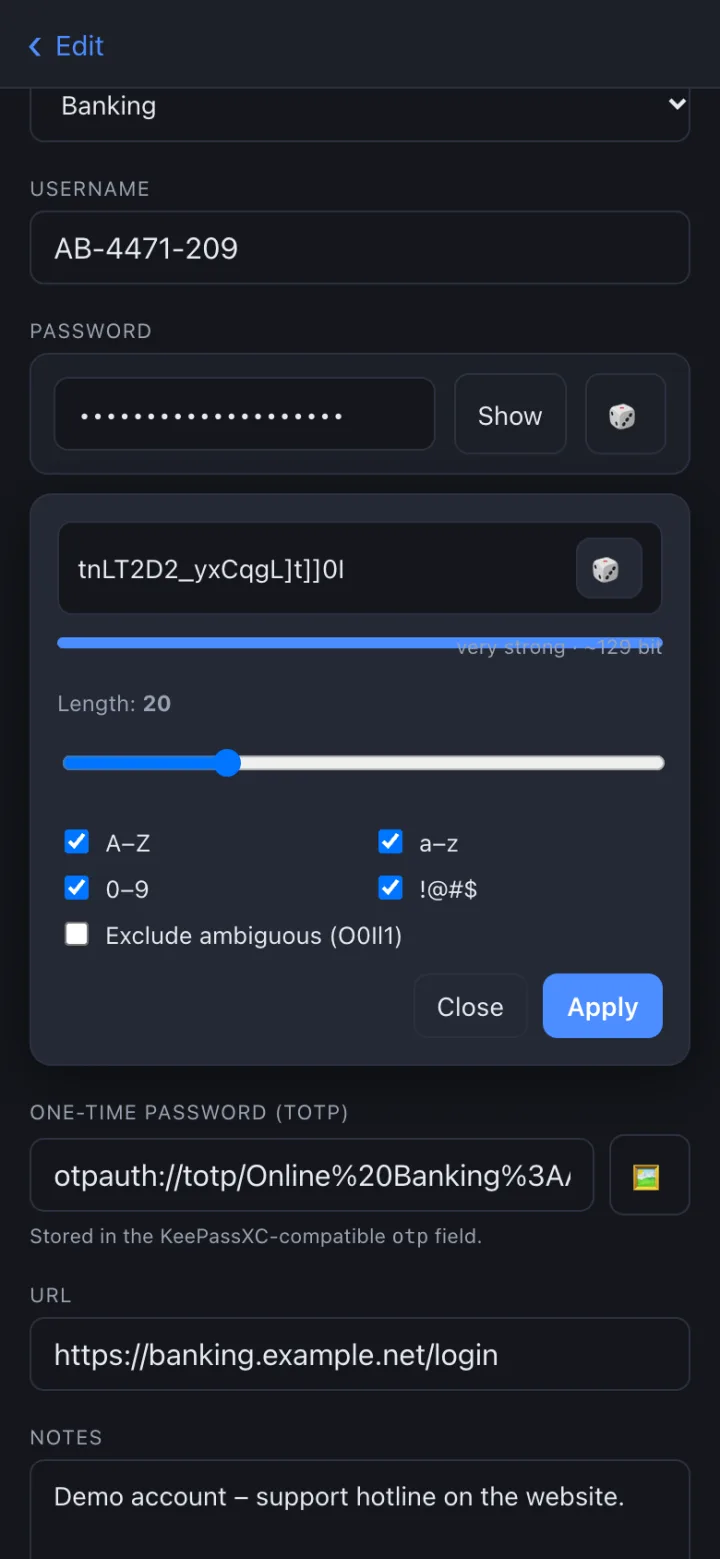
  • 🎲 opens the password generator with length, character classes and strength meter.
  • You choose the group in the form; New group … creates one on the spot.
  • Deleting moves an entry to the 🗑 Trash; from there everything can be restored or deleted permanently.
  • History shows earlier versions of an entry and restores them.

There’s no Save button: every change goes to the server immediately, and the confirmation appears as soon as it has arrived there.

Editing with password generator

6. Set up one-time codes (2FA)

  1. Open the entry with Edit.
  2. Next to the one-time code field: 🖼 reads the QR code from an image (e.g. a screenshot of the setup page), 📷 scans it live with the camera on a phone or tablet. You can also paste the otpauth:// link or the key directly.
  3. Apply – from now on the entry shows the current code with an expiring circle.

Codes are stored in KeePassXC’s format; the app also reads codes from KeePass 2.47+. Exports from Google Authenticator are accepted if they contain one account per QR code.

7. Syncing and working offline

  • 🔄 Sync fetches changes from the server, merges them and uploads the result. On Android and iOS this also happens when you open the app and when you return to it.
  • If two devices changed something at the same time, the merge happens entry by entry – the newer change wins, the older one ends up in the entry’s history. Nothing is simply overwritten.
  • Offline (Android, iOS): The app opens the encrypted copy on the device. Changes stay there and are merged the next time the app reaches the server. The Mac needs the server.

8. Autofill and passkeys

Android

  1. In the vault tap 🛡 Autofill and choose Simply KeePass as autofill service and under the passkey providers. In Chrome additionally: Settings → Autofill services → Autofill using another service.
  2. “Simply KeePass” appears in the sign-in field of an app or website. After the fingerprint you get the matching entries.
  3. Android offers to save newly typed logins.

Matching goes by the entry’s URL or the linked app – never by the title, so a wrong site gets nothing.

Passkeys

When a website offers a passkey, you choose Simply KeePass. New passkeys go into an entry of their own by default (as in KeePassXC), and the private key is never shown. When signing in, the app offers “Passkey from your vault”.

iPhone & iPad

The AutoFill extension for passwords and passkeys (from iOS 17) is finished and tested; iOS offers it as soon as the app is signed through the Apple Developer Program. Then: Settings → General → AutoFill & Passwords → Simply KeePass.

9. Unlock by another device

For a tablet without a good fingerprint sensor, or the Mac after Touch ID has expired: a device where the vault is open releases the other one.

  1. Pair: On the device that should ask, unlock once with the master password and tick Unlock by another device.
  2. Ask: On the unlock screen, tap the phone button next to Unlock. A four-digit code appears. The Mac asks on its own as soon as Touch ID has expired.
  3. Approve: Open the app on the other device (or press 🔄 Sync). The request appears with the same code – compare and tap Approve.

What gets transferred is not the master password but key material encrypted for this one round only. 📱 Devices lists the paired devices and removes them.

10. Locking

The vault locks itself – after all changes have been saved:

  • after 30 minutes without use,
  • when the Mac goes to sleep (not already on screen lock),
  • on Android and iOS, when the app was in the background for more than 60 seconds – so briefly switching to the browser and pasting doesn’t lock it,
  • with ⌘L, closing the window or 🔒 Lock in the phone layout.